Ready to Rock Out with RubberBanditz
Ready to set new goals for yourself? Perhaps you want to be able to run an obstacle course race, or hit 10 pull-ups in a row. But why not aspire to do the impossible? Why not set the ultimate goal, like getting your first one-arm pull-up?
I know. It sounds crazy, but hear me out. With the proper amount of preparation and performance of the proper exercises (with the proper amount of volume), it is possible. Even for a woman!
That is why I am making 2018 the year that I get my first one-arm pull-up. And this is how I’m doing it.
The Prep
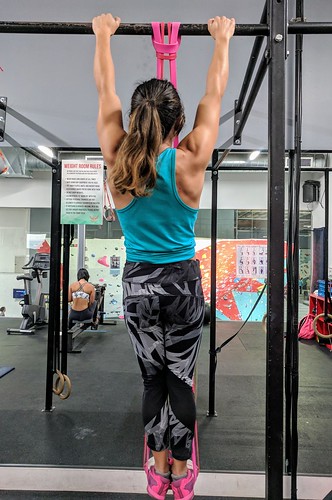
Most blog articles that I have read about one-arm pull-up training states that to do the one-arm pull-up, you first need to be able to knock out at least 15-20 pull-ups with proper form; that means, no kipping and no half-reps. I personally would aim for 20 for more shoulder stability because one-arm hangs are ridiculously tough on your shoulders, tendons, and joints.
With that being said, listen to your body and take care of your shoulders. Do these shoulder exercises before each workout to strengthen your rotator cuff muscles and to prevent dislocation.
I also recommend increasing your grip strength and being comfortable doing dead hangs with proper form. You must be able to do a dead hang with both arms for at least 2 minutes straight and do a one-arm dead hang for 30 seconds on each arm.
The Exercises
Once you have cleared the prep work and are comfortable with doing 20 pull-ups and one-arm hangs, you are ready to start your training! I am currently at this point and am utilizing one of the best exercises for one-arm pull-up training: the banded one-arm pull-up negative.
To do the banded one-arm pull-up negative, set up the Robust Band and the Medium Band as if you are about to do an assisted banded pull-up.


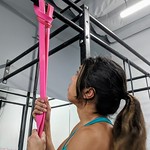
Next, place both feet into the straps and keep both legs fully extended. You will then pull yourself up as if doing a commando pull-up (the working arm has the palm facing towards you, while the assisting arm has the palm faced away from you).

Brace your core, grip the bar tightly, and carefully release the assisting arm from the bar so that only one arm is flexed and holding the bar. 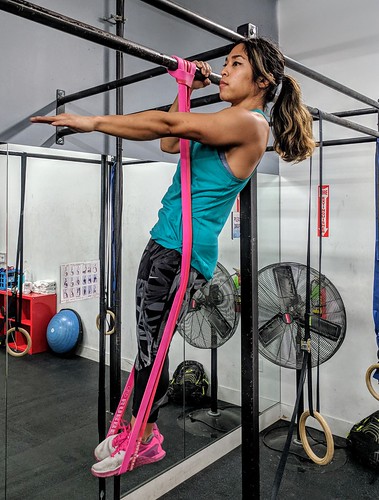
Slowly lower yourself down (as slowly as you can) until your working arm is fully extended at the bottom of the negative. 


If you find that doing a negative with both the robust and the medium band is difficult, work on holding the one-arm flexed hang position first for at least 30 seconds on both sides. Once you can do that comfortably, try attempting the negatives once again!
The Workout Routine
Once you are comfortable with doing a full one-arm pull-up negative on both sides with the bands, try the following routine at least twice a week after your workout session (with a minimum of 2 days of rest in-between!)
Workout:
Start by doing 2-3 sets of 6 banded one-arm pull-up negatives on both sides, alternating sides each time.
Rest 2 minutes between sets.
Work your way up to eventually doing 3 sets of 8 banded one-arm pull-up negatives on both sides with good form (i.e. you can lower yourself slowly and in control without collapsing your shoulder) before decreasing the resistance. When you are ready, start using only the robust band, then decrease the resistance even more by utilizing lighter and lighter resistance bands so you can eventually do the negatives without the bands!
The Mental Toughness
You will want to quit. You will not see progress overnight. You will tell yourself to give up and that doing a one-arm pull-up is impossible. That is what makes this movement so tough—it requires mental resilience and confidence in your capability to accomplish something great. Commit to your training, and your progress will come.
But progress starts with action. Take a look at our assisted pullup band kits and start your one-arm pull-up training today!
This article was written in collaboration with Charmaine Platon. Charmaine is a Registered Nurse and Certified Personal Trainer working in Los Angeles. She is a Ninja Warrior in training who aims to help women get stronger and increase their upper body and grip strength. Instagram: @thenurseninja

